For new rifle owners and budget-conscious shooters, selecting the proper aiming system can be overwhelming. Standard iron sights require precise alignment of the rear aperture, front sight post, and target, which significantly slows down target acquisition in high-stress home defense or dynamic sporting scenarios. Reflex sights solve this issue by placing a single illuminated aiming point on the target plane. However, without a foundational understanding of optic technology, mounting methods, and common operational errors, a shooter risks wasting ammunition and losing zero. This comprehensive guide from EZshoot explains everything you need to know about red dot systems to maximize your shooting accuracy.
🔴 Critical Takeaway: A red dot sight is designed for rapid, two-eyes-open target acquisition. By keeping both eyes open, you preserve peripheral vision, maintain full situational awareness, and decrease target engagement times.
What is a Red Dot Sight and How Does It Work?
At its core, a red dot sight—technically known as a reflective or collimator sight—uses simple optical physics to project an aiming point. Inside the housing, a low-power Light Emitting Diode (LED) shines a red or green beam of light toward a specially coated, curved objective lens. This front lens features a dichroic coating that acts as a selective mirror; it reflects the specific wavelength of the red or green LED back toward the shooter's eye while allowing other visible light from the target environment to pass through uninterrupted.
Because the reflective lens is parabolic, it collimates the light. Collimated light rays travel parallel to each other, making the reticle appear projected at an infinite distance. This ensures that no matter how your head moves behind the optic, the dot remains aligned with your target's point of impact, minimizing the visual adjustments required by traditional scopes. This elegant design is detailed further in the Wikipedia page on reflex sights, explaining the foundational transition from aviation fighter-jet HUDs to modern personal firearms.
- Optical Source: Red dots use simple, robust Light-Emitting Diodes. Holographic sights use highly sensitive, higher-power laser diodes.
- Battery Consumption: LED-based red dots consume microamps, lasting between 20,000 to 50,000+ hours. Laser-driven holographic sights draw milliamps, typically lasting only 500 to 1,500 hours.
- Magnifier Compatibility: Under a 3x magnifier, a red dot's center aiming point enlarges by 300%. A holographic reticle's center dot remains visually at 1 MOA, providing a cleaner aiming point at longer distances.
- Window Shatter Resilience: If the front lens of a red dot breaks or gets mud on it, the point of aim is lost. If a holographic window is partially shattered, the laser can still project the reticle through any remaining clear glass.
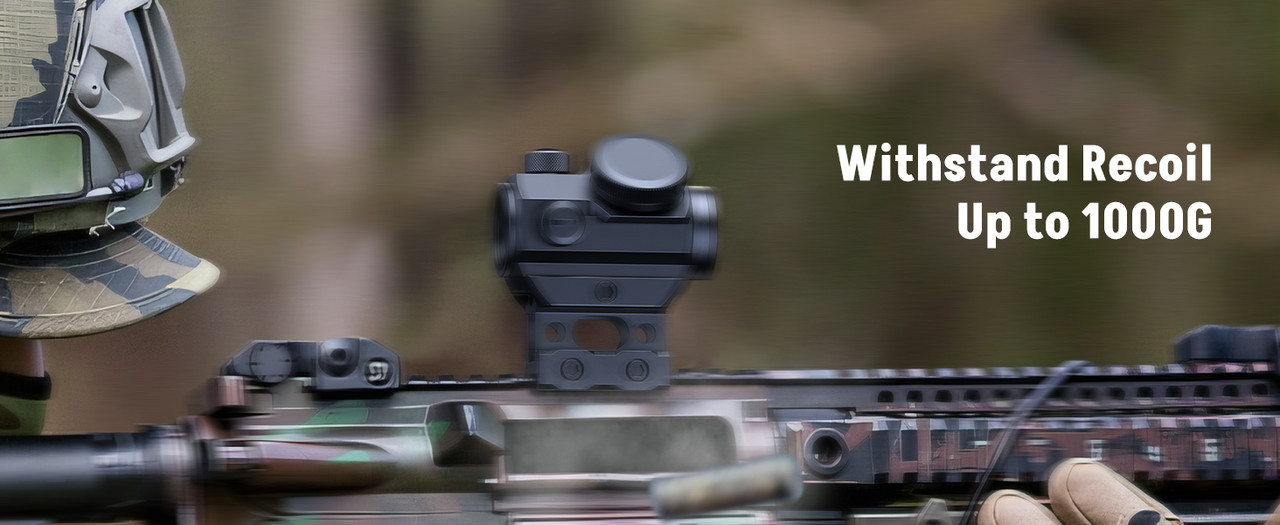
- Housing Material: Avoid weak plastics. Insist on 6061-T6 aluminum, which resists impacts and drops on the range.
- Waterproofing Integrity: Ensure the optic is sealed with O-rings and nitrogen-purged to prevent internal fogging in cold or humid conditions.
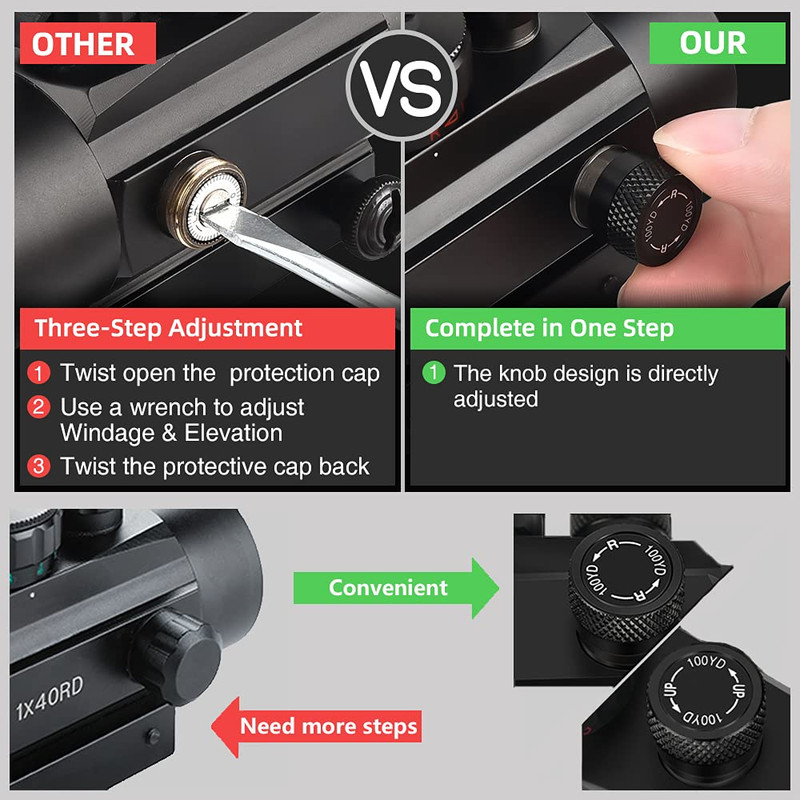
- Windage/Elevation Detents: Sights must feature tactile, audible "clicks" that lock in adjustments so that the optic holds its zero under continuous firing.
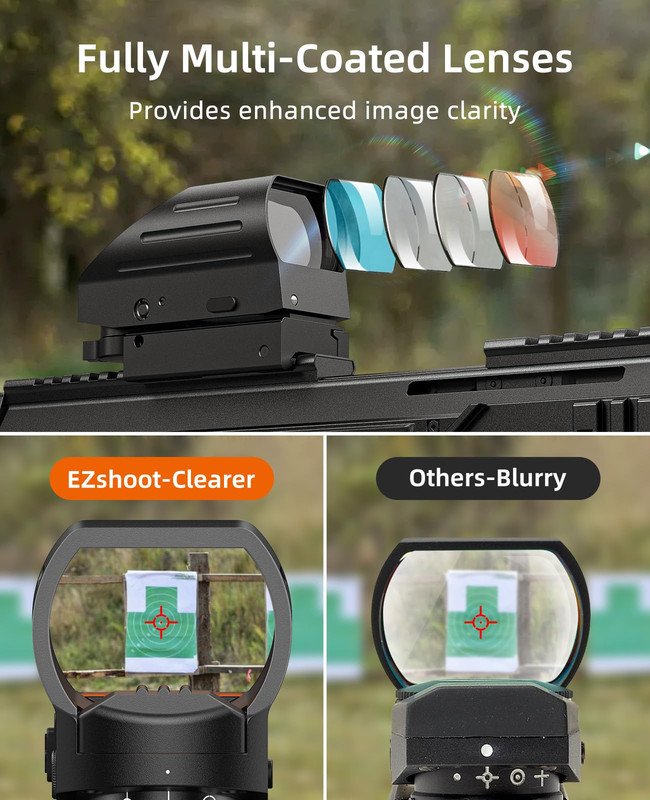
- Multi-Coated Optics: Opt for multi-layered anti-reflective glass coatings to maximize light transmission in dim target environments.
How to Mount a Red Dot Sight: Step-by-Step Guide
An optic is only as reliable as its mounting interface. If a mount is installed loose or off-center, your point of impact will shift dynamically with every shot. Following a standardized installation procedure ensures a permanent, secure zero.
⚙️ Step-by-Step Installation Process
- Clear the Weapon Platform: Remove the magazine, lock the bolt to the rear, and visually inspect the chamber to ensure the rifle is completely unloaded and safe.
- Prep the Receiver Rail: De-grease the flat top Picatinny rail and mounting base screws using an alcohol wipe or a firearms-safe degreaser. Oils left from factory production can cause the mount to slide.
- Choose Your Co-Witness Position: Decide between an "Absolute Co-Witness" (where your iron sights sit directly in the center of the optic window) and a "Lower 1/3 Co-Witness" (where the iron sights sit in the lower third of the window, leaving the center clearer).
- Apply Threadlocker: Apply a single drop of medium-strength blue threadlocker (such as Loctite 242) to the mounting screw threads. 🔴 Never use permanent red threadlocker, as it requires heat to disassemble.
- Apply Forward Pressure While Tightening: Place the mount onto the receiver rail. Push the mount forward toward the muzzle as you hand-tighten the cross-bolts. This ensures the recoil lug sits flush against the front of the Picatinny slot, preventing movement under recoil.
- Torque to Manufacturer Spec: Using an inch-pound torque wrench, tighten the mounting bolts to the exact specifications. Most Picatinny mount-to-rail clamps require 20 to 25 inch-pounds (in-lbs).
⚙️ Pro Tip: Over-tightening optic screws is a common cause of cracked lenses and stripped threads. Hand-tightening with a simple Allen wrench can easily exceed 40 in-lbs, stressing the metal. Always use a calibrated torque wrench.
Common Red Dot Sight Mistakes to Avoid
Avoid these typical rookie errors to prevent zero-retention issues and visual fatigue during practice.
1. "Bridging" the Optic Mount
Rifle handguards can flex under heat and pressure. "Bridging" refers to mounting the optic partially on the rigid receiver and partially on the forward handguard. Always mount your red dot entirely on the single-piece upper receiver rail to maintain a true, permanent alignment with the barrel.
2. Mounting the Optic Backward
This sounds obvious, but it is a frequent occurrence with compact sights. The angled, highly reflective objective lens is designed to face forward (toward the muzzle), while the flat ocular lens faces your eye. Mounting it backward redirects the emitter away from your eye, leaving the glass blank.
3. Setting Reticle Brightness Too High
🔦 Indoors or in dim lighting, cranking the reticle brightness to its maximum setting creates "blooming" or halo reflections inside the tube. This obscures your target and strains your eye. Adjust the brightness so the dot is just bright enough to be clearly visible against your target.
- Turn Down the Brightness: Lowering the reticle's light output minimizes the visual bleed, making the dot appear smaller and rounder.
- Use a Rear Peep Sight: Flipping up a rear backup iron sight and looking through the small pinhole aperture filters out distorted light rays before they reach your cornea, instantly sharpening the dot.
- Pair with a Magnifier: Adding a 3x magnifier behind your red dot can physically reshape the light path, clearing up the visual distortion for many shooters.
- Switch to a Prism Scope: Since prism scopes feature an etched glass reticle instead of a reflected LED beam, they remain perfectly crisp even with severe astigmatism.
Deep Dive: High-Performance EZshoot Red Dot Sights
EZshoot offers a lineup of rugged, budget-friendly optics engineered to solve the real-world problems faced by new shooters. Below are our top recommendations for 2026.
EZshoot Rechargeable 28x40mm Red Green Dot Sight
🔦 USB-C Rechargeable & Wide-Window Design: This open-reflex optic features an integrated rechargeable battery system, eliminating the need to continuously buy CR2032 cells. The extra-large 28x40mm objective lens provides a massive window with an unrestricted field of view, making it excellent for fast-moving target transitions on shotguns or modern rifles.
📋 Decision Summary Box
| Key Specs: | 28x40mm Objective Window, Red/Green dual-color, 4 Reticle options, USB Charging. |
| Best For: | Defense shotguns, target transitions, and shooters who want to avoid buying batteries. |
| Pros: | Massive field of view; cost-effective rechargeable design; easy reticle customization. |
| Cons: | Exposed LED emitter requires care in heavy rain or mud. |
EZshoot 1x30mm Red Green Dot Sight Scope
🛡️ Enclosed Tube-Style Durability: If you need a sight that resists dirt, water, and rough handling, the enclosed 1x30mm is your best match. The nitrogen-purged tube body protects the internal LED emitter from rain, dust, and mud, ensuring a clear aiming point in harsh weather conditions.
📋 Decision Summary Box
| Key Specs: | 1x30mm Tube Diameter, 5 MOA Dot, Red/Green Illumination, 5 Brightness levels. |
| Best For: | Budget AR-15 builds, outdoor modern training, and rimfire plinking. |
| Pros: | Fully enclosed and fogproof housing; highly shock-resistant; includes lens covers. |
| Cons: | Tubular body slightly limits extreme peripheral vision compared to open glass. |
EZshoot Holographic-Style 4-Reticle Optic Scope
🏹 Versatility with Multi-Reticle Design: Designed for rapid adaptation, this optic lets you toggle between four distinct reticles (dot, circle-dot, crosshair, and circular crosshair). This provides immediate visual feedback, allowing you to transition between precision targeting and speed shooting.
📋 Decision Summary Box
| Key Specs: | 4-Reticle Selector, Red/Green options, built-in Picatinny mount base. |
| Best For: | Dynamic 3-Gun competitions, modern rimfire setups, and target transition drills. |
| Pros: | Four reticles in one housing; very lightweight modern frame; clear glass. |
| Cons: | Requires manual battery changes (not rechargeable). |
🏷️ Exclusive Promotion: Enter discount code SALESP20 at checkout to save an extra 20% OFF your entire EZshoot order!
Frequently Asked Questions About Red Dot Optics
- Capture a Digital Image: Focus your smartphone camera through the optic's glass. A camera lens has no organic astigmatism and will record a perfect representation of the projected LED.
- Rotate the Optic: Look through the sight and rotate the unit 90 degrees. If the smear or starburst shape rotates with the optic, the LED mount or glass coating is physically damaged. If the smear shape remains at the same angle, your eye is refracting the light incorrectly.
- Base Mount Screws (Picatinny rail clamp): Torque between 20 to 25 in-lbs to prevent the mount from slipping forward under recoil.
- Optic Ring/Housing Screws: Torque between 12 to 15 in-lbs to secure the optic body without crushing the internal circuitry.
- Apply Threadlocker: Always use a removable thread-locking fluid (like blue Loctite) to prevent screws from vibrating loose.
- Target Distances: At distances beyond 25 yards, parallax shifts are practically non-existent on quality reflex sights.
- Eye Alignment: Even if your eye is slightly off-center from the optic's optical axis, the projected dot will remain on target.
- Extreme Angles: Looking through the absolute edge of the lens at a very close target can cause a minor shift in the point of impact.
- Redundancy: If your optic's battery dies or the glass is compromised, iron sights provide an immediate backup.
- Quick Reference: Having your iron sights visible in the lower portion of the optic window (lower 1/3 co-witness) provides a quick reference for consistent cheek weld placement.
- Daytime Visibility: The human eye is highly sensitive to green wavelengths, making green reticles stand out clearly against bright, sunlit backdrops.
- Battery Savings: Red LEDs require less power to illuminate, yielding longer battery runtimes.
- Night Vision Use: Red light is less disruptive to biological night vision adaptation than green light.
Conclusion
Choosing and configuring the right red dot sight in 2026 is one of the most effective ways to upgrade your rifle or shotgun platform. By understanding how reflex optics operate, mounting your sight securely to manufacturer torque specifications, and selecting an optic that matches your environmental demands, you can significantly improve your shooting accuracy and speed.
Whether you choose the rechargeable convenience of the EZshoot Rechargeable 28x40mm, the rugged weather protection of the EZshoot 1x30mm Tube Sight, or the rapid target tracking of the EZshoot Holographic Optic, you are investing in a durable, budget-friendly aiming system designed to perform when it counts.
🎉 Don't forget to use coupon code SALESP20 at checkout to take an extra 20% OFF your entire EZshoot optics purchase today!
Leave a comment